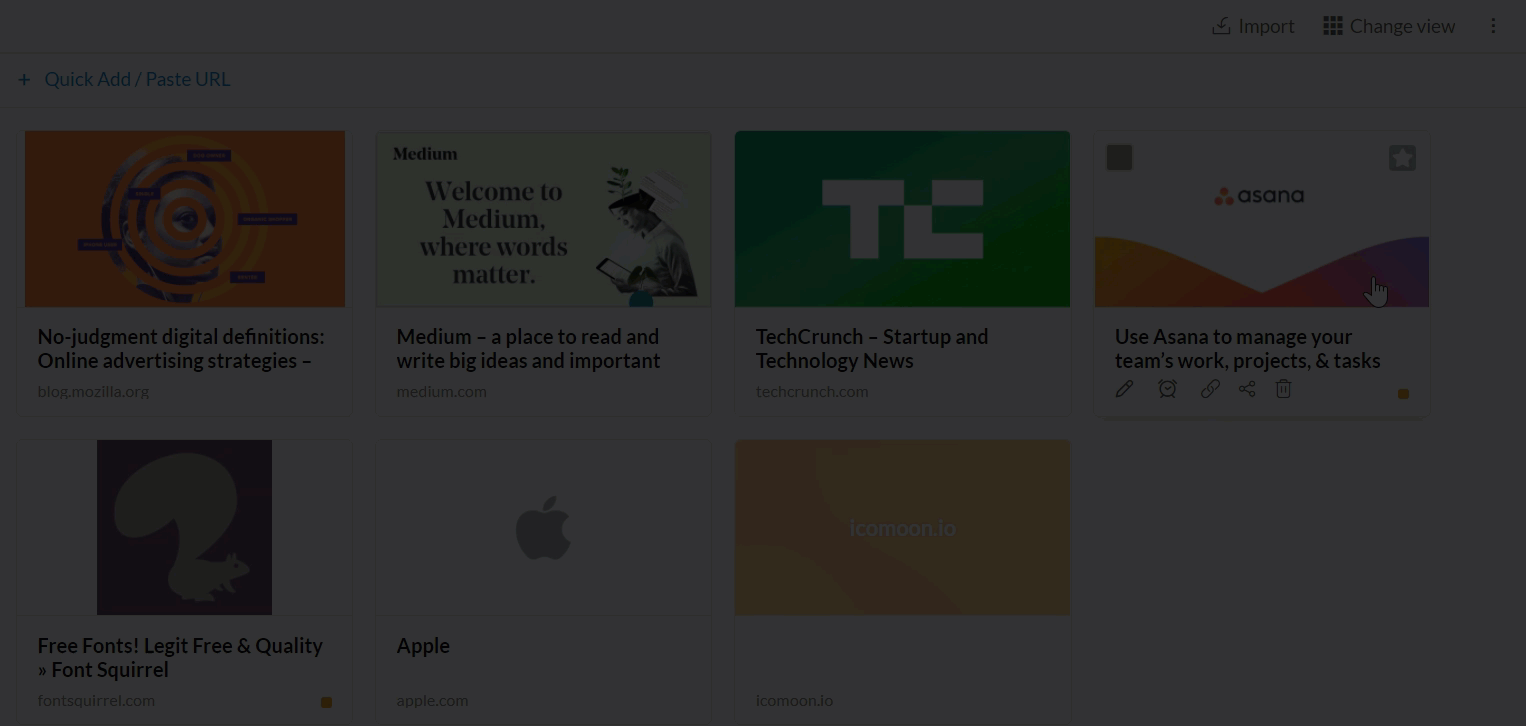
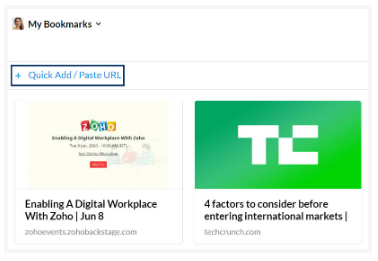
Bookmarks application in Zoho Mail Suite helps you to save various Web URLs of websites or articles you come across on the internet. You can save web URLs or articles to view them in the future. Further, the Zoho Mail Bookmarks app allows you to share these web links with different groups for the benefit of the members in the groups.
When you add Web URLs as Bookmarks by marking them as favorites in your browser, you will be able to access them only from that particular system and in that browser only.
The Bookmarks application in Zoho Mail helps in managing all your web URLs in the cloud, to access them from anywhere and at any time you need. You can also install Zoho Mail Bookmarks extension that is available in Google Web store and Firefox Addons to save these web URLs in a click. These bookmarks can be accessed from the Bookmarks application in Zoho Mail.
Add Bookmarks
Steps to Add a Bookmark
-
Log in to your Zoho Mail account.
-
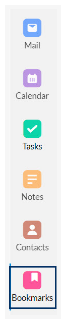
Navigate to the Bookmarks application in the left pane of your mailbox.
-
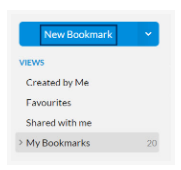
Click New Bookmark to add a bookmark.
-
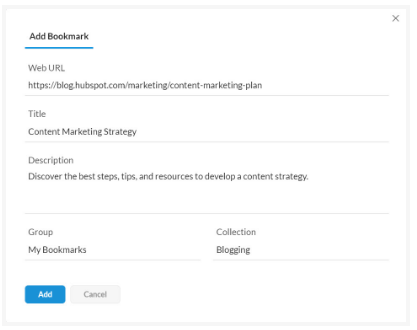
Provide the web URL of the website you want to bookmark.
-
Provide a short title and a description for the bookmark to locate it easily.
-
Save it under 'My Bookmarks', if it's for your own reference.
-
Select a Group to share it with a group.
-
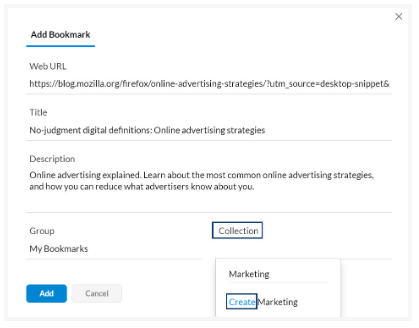
Select or create the collection under which you want to place the Bookmark.
-
Click Add to save the bookmark.
Note:
-
You can also add bookmarks by dragging and dropping the relevant URL from browser tabs into the Bookmarks App.
-
The bookmarks that have been shared with you either personally or through a group can be viewed using the Shared with me option from the left pane.
The Quick Add/ Paste URL option in the header menu can also be used to add a new bookmark.
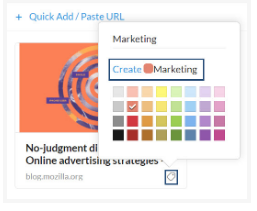
Managing Collections
You can create collections under My Bookmarks option or any group to save bookmarks of similar context together.
Creating Collections
-
Log in to your Zoho Mail account.
-
Navigate to the Bookmarks application in the left pane of your mailbox.
-
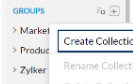
Right-click on the My Bookmarks menu or any of the Groups listed.
-
Click Create Collection from the listing and enter a suitable name for the collection.
-
The new collection is now added to the chosen group menu.
You can also create a new collection while adding/ editing a bookmark. Click the Collection field and create a new collection by providing a suitable name and select Create.
Adding a Bookmark to a Collection
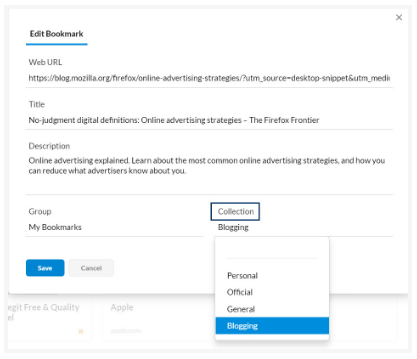
You can add a bookmark to a collection by following these steps. You can also edit an existing bookmark and add it to a collection by following the steps given below.
-
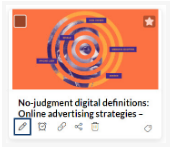
Hover over a saved bookmark and click the Edit icon.
-
Select My Bookmarks or any other group from the Group field.
-
Click the Collection field.
-
The Collections under the My Bookmarks menu or the chosen Group will get listed.
-
Select the required collection and click Add.
-
The new bookmark will now get added to the chosen collection.
Editing collections:
You can rename a collection by right-clicking the collections listed under My Bookmarks option or any group.
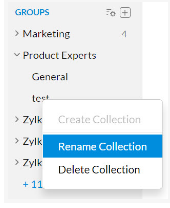
If you want to delete a collection that you've created, right-click the collection and click Delete Collection.
Note:
-
If you delete a collection, all the bookmarks added to that collection will also get deleted.
-
Only the collections created by you can be edited by you. The collections created by the admin or any other members cannot be edited by you.
Other options
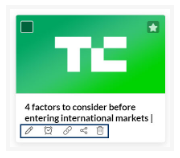
You can hover over the bookmarks from the list and select the Edit icon to edit the bookmark. You can use the Set reminder icon to set an alarm to view a bookmark later. You can copy the URL of any bookmark by clicking on the Copy bookmark URL option. By clicking the Share icon, you can share the bookmarks via various platforms listed. Click the Delete icon to remove a bookmark from the saved list.
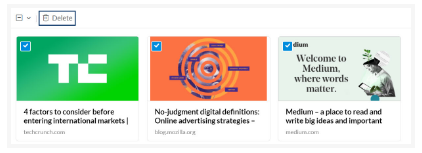
You can also delete multiple bookmarks at once. Just select the bookmarks you wish to delete and click the Delete icon on the header menu.
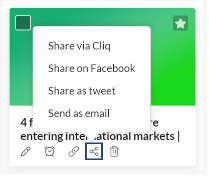
Sharing Bookmarks
Your bookmarks in Zoho Mail can be shared using Zoho Cliq, Facebook, Twitter, or as an email. Hover over a saved bookmark and click on the Share icon and select one of the options given. The following responses will be observed when you choose any one of the options in the pop-up menu.
-
Share via Cliq - When you select Zoho Cliq, a list of your contacts in Cliq appears, select the recipients from it to share the bookmark.
-
Share on Facebook/ Share as tweet - In the case of Facebook or Twitter, you need to be logged into your account, to share the bookmark.
-
Send as email - An email will be composed in the Zoho mailbox with the title of the bookmark as the subject of the email.
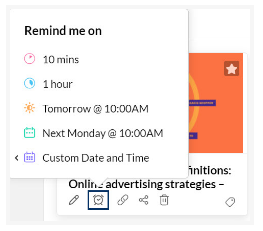
Setting Reminder
You can set a reminder to view the web URLs or the articles that you've bookmarked.
-
Hover over the respective bookmark and click the Set reminder icon.
-
A Remind me on pop-up will be displayed.
-
Select a preset alarm time listed in the pop-up menu.
-
You can also custom set reminder using the Custom Date and Time option.
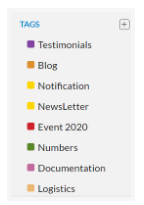
Tagging Bookmarks
Create Tags
You can create new tags by clicking the

You can also create tags while adding tags by clicking the Add Tag icon in the respective bookmark.
You can associate multiple tags with each of your bookmarks. Click the Add Tag icon in the bottom right corner of the respective bookmark, and select the relevant tags.
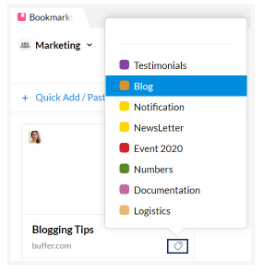
You can also view your bookmarks by tags from the left menu pane. Select one of the tags from the listing, and all the bookmarks with that tag will be listed.
Import/ Export Bookmarks
You can import or export bookmarks by following the steps given below.
Importing Bookmarks
-
Log in to your Zoho Mail account.
-
Navigate to the Bookmarks application in the left pane of your mailbox.
-
Click the My Bookmarks option or any other group to which you want to import the bookmarks.
-
Click on the Import icon located in the right corner of the header pane.
-
Select the required .html file from your local storage and click open.
-
Refresh the page and the imported bookmarks will appear under My Bookmarks or the selected group.

Exporting Bookmarks
-
Log in to your Zoho Mail account.
-
Navigate to the Bookmarks application in the left pane of your mailbox.
-
Click the My Bookmarks option or any other group from which you want to export the bookmarks.
-
Click on the More options icon located in the right corner of the header pane and select the Export Bookmarks option.
-
An email containing the bookmarks as .html file will be sent to your mailbox.
-
You can download and save the file in your local storage.

Note:
-
You can only import to/ export from My Bookmarks or any group and cannot import to/ export from a collection.
Bookmark Views
By default, the thumbnail view is chosen in the Bookmarks app. You can switch the bookmarks view to the List view using the Change view icon at the header pane.